Building and Deploying a Next.js Portfolio on Cloudflare Pages
Written by
At
Felix Ng
Apr 27, 2026
Funny how developers can build and maintain systems used by thousands to millions of users. Yet when it comes to our own side projects, they often left unfinished. That discipline and consistency somehow disappear, right.
I'm no exception to this. But I never had a proper one. So I thought to myself: why not build a real one (for fun) - start with a simple porfolio to showcase my work and share my thoughts?
TL;DR
This post explains how I built my portfolio with Next.js and Cloudflare Pages.
- I started with the goal of building a portfolio that could showcase my work and give me a place to share my thoughts.
- I chose Next.js because I wanted to try it for a personal project and pair it with a design I liked.
- I chose Cloudflare Pages because it offers a generous free tier, simple GitHub integration, and strong global performance.
- The setup works best when the site only needs static pages, since Cloudflare Pages does not support Node.js server features in this deployment model.
- To make Next.js compatible, I set
output: "export"and disabled built-in image optimization withimages.unoptimized = true. - After configuring the build settings, I connected the Git repository, selected the static export preset, and deployed the site to Cloudflare’s CDN.
- The main takeaway is that building and shipping your own portfolio is a practical way to showcase your work, learn, and create a home for your writing and projects.
Why Next.js and Cloudflare Pages?
Simply because it's free. (Yeah, I'm cheap 😅.) One very important thing about this combination is that you can only serve static pages. That means there are some unsupported features that require a Node.js server or dynamic logic. For more details about the static export limitations, I highly recommend checking out the official Next.js documentation on Static HTML Export.
But if you only need to serve static pages, which is the case for my portfolio, I don't need any of these features, and I can easily work around them by fetching data from external APIs or using client-side rendering. So it's a perfect fit for my portfolio.
Next.js?
At first, I choose Astro since I already have experience with it, but I want to try out something that I always hate on, which is Next.js and just because Fumadocs UI looks so good.
Cloudflare Pages?
GitHub Pages is a great option for hosting static sites, but it has some limitations that I find frustrating and restrictive. Maybe I'll do the comparison in the future, but for now, I just want to say that it doesn't fit me very well, especially when it comes to the performance and reliability Cloudflare offers.
Cloudflare Pages offers a very generous free tier, and it's super easy to set up with GitHub. Plus, Cloudflare's global CDN ensures that my portfolio loads quickly for visitors around the world. After some consideration, I decided to go with Cloudflare Pages over GitHub Pages for better performance and reliability.
Getting Started
To get started, you need to build your own portfolio. You can follow the official Next.js documentation to create a new Next.js app, or you can use a starter template like Fumadocs UI to speed up the development process.
For me, I found a very good template to start with as the foundation of my portfolio. Thank you hexxa for open-sourcing his personal website. I copied most of the layout and styles from his project, then built and customized it to fit my personal vibe and style.
Configuration before Deployment
With a normal Next.js setup, you need some configuration in your next.config.js to make sure it works properly with Cloudflare Pages. Here are some of the things that need to be configured:
- Set the
outputtoexportto enable static export mode.
/**
 * @type {import('next').NextConfig}
 */
const config: NextConfig = {
  output: "export", // Add this line
  // Other configurations...

  // Optional: Change the output directory `out` -> `dist`. I keep it as default.
  // distDir: 'dist',
};- Image optimization: You need to configure
images, since the default Next.js image optimization is not supported in static export mode. I decided to disable image optimization for simplicity. Check this out for custom image optimization options.
/**
 * @type {import('next').NextConfig}
 */
const config: NextConfig = {
  output: "export",
  images: {
    unoptimized: true,
  },
};
Alright, I think we all good now, you can push your code to GitHub and move on to the next step now.
Deploying to Cloudflare Pages
First, you need a cloudflare account, if you don't have one, head to Cloudflare Pages and sign up.
Once you have an account, you can create a new project. On the dashboard sidebar, follow:
Compute > Workers & Pages > Click on Create application > Then, you can connect your Github (if you haven't connected yet)
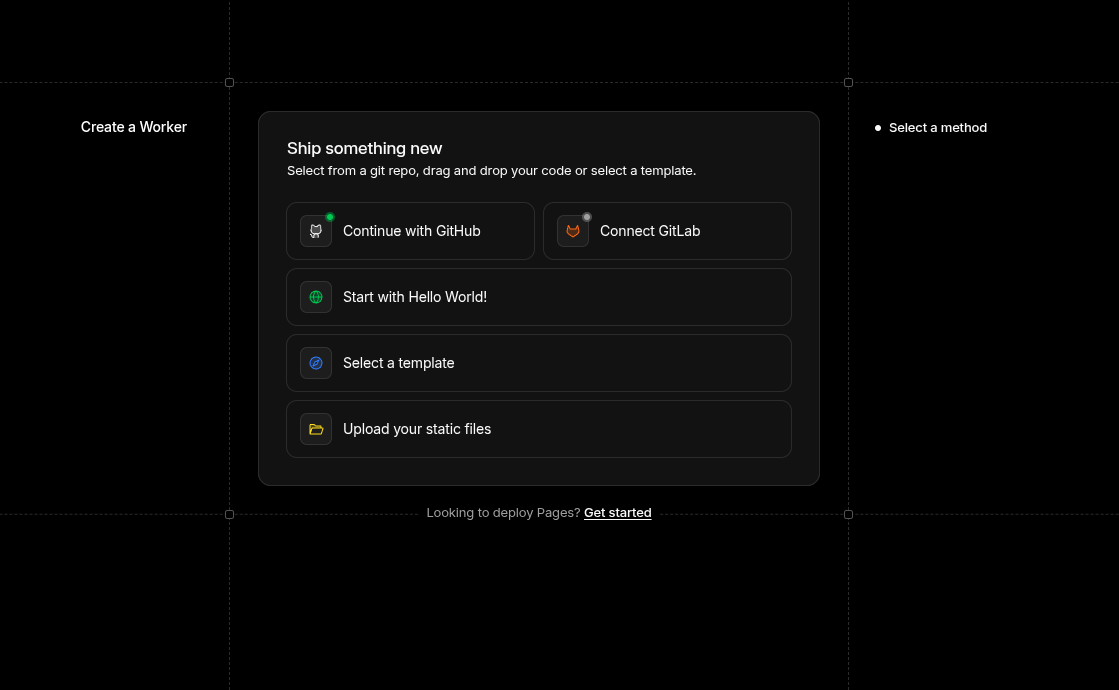
Since we only want to deploy a static site, we can click on Get Started under the options card. Or simply go to https://dash.cloudflare.com/[your-account-id]/workers-and-pages/create/pages to create a new Pages project.
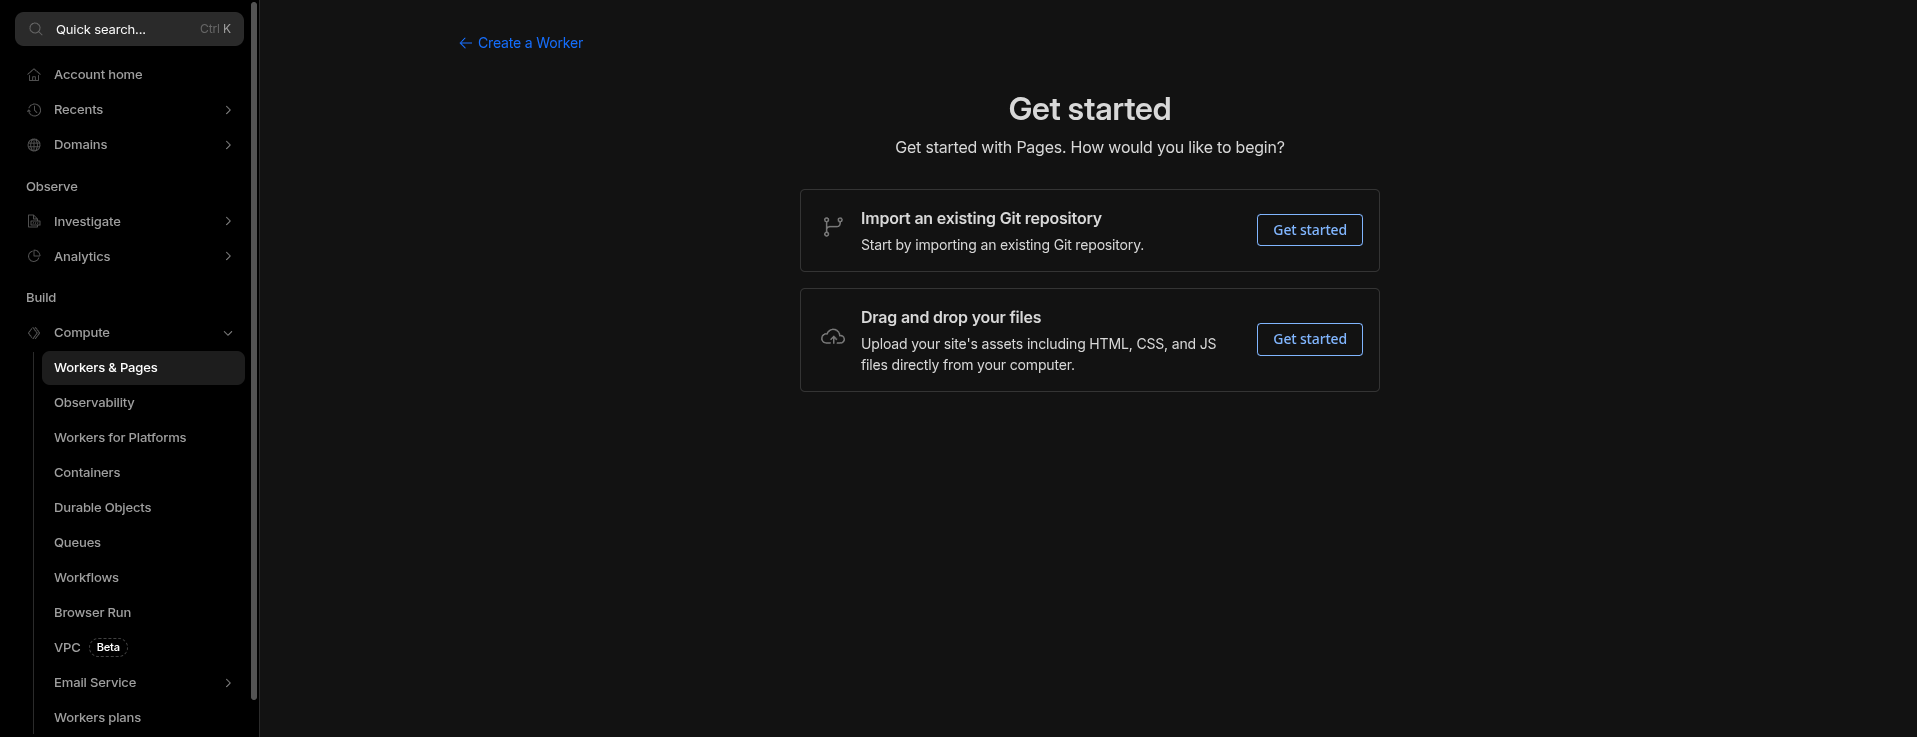
We gonna choose the Import an existing Git repository option, and then select the repository that contains your Next.js portfolio code.
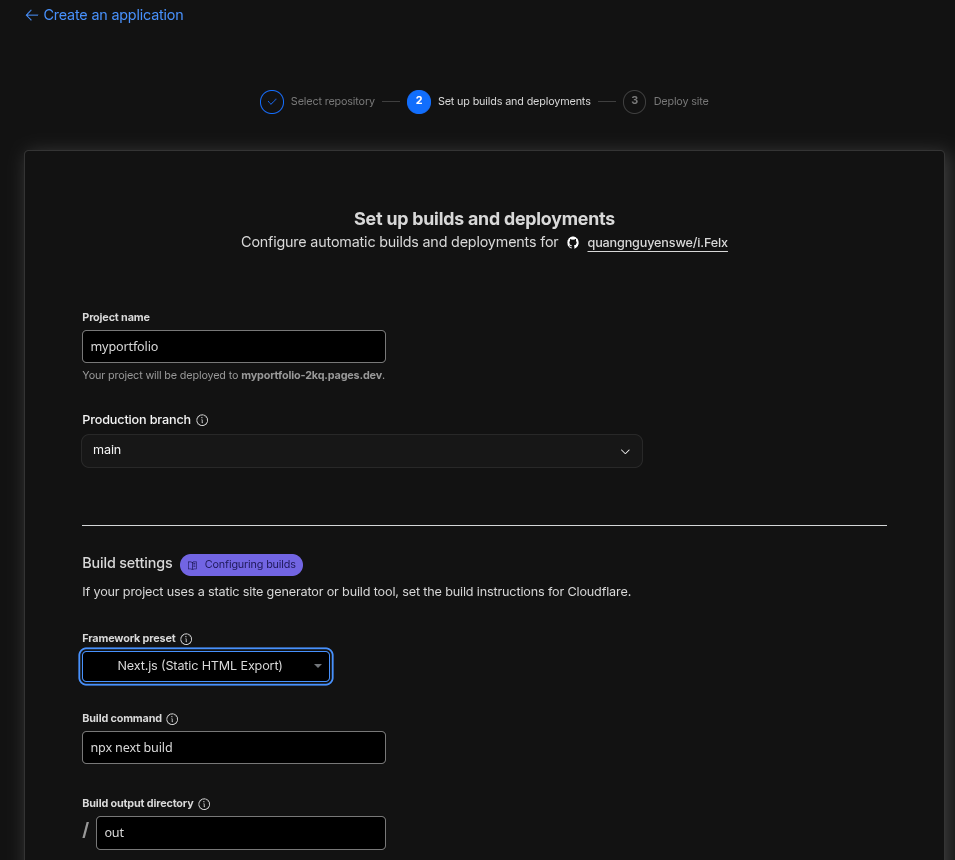
In Set up builds and deployments step, cloudflare will automatically detect that it's a Next.js project and pre-fill the build settings for you. You just need to make sure the settings are correct:
- Framework preset:
Next.js (Static HTML Export)Once selected, the rest of the settings will be auto-filled for you. - Build command:
npx next build - Build output directory:
out(ordistif you changed thedistDirin yournext.config.js)
Now you can click on Save and Deploy to start the deployment process. Cloudflare will clone your repository, install dependencies, build your Next.js app, and deploy it to their global CDN. The whole process usually takes a few minutes.
Important Note
Project name going to be part of your website URL, so choose it wisely. For
example, if you name your project my-portfolio, your website will be
deployed to https://my-portfolio.pages.dev. You can change the project name
later or add your custom domain, but it's better to choose a good name from
the start.
Once the deployment is complete, you can visit your new portfolio website at the provided URL. You can also manage your deployments, view logs, and configure settings from the Cloudflare Pages dashboard.
What I gained from this experience
- Full Control - All the source code is fully controlled by me, and I can customize it to fit my needs and preferences. If I want all the features that Nextjs offers, I can try out Cloudflare Workers that run on the edge(but that's a story for another day).
- Cost-Effective - Monthly cost is $0/month. Domain registration is the only cost if I decide to use one.
- Performance - Cloudflare's global CDN ensures that my portfolio loads quickly for visitors around the world, providing a great user experience.
- Learning Experience - This is the first time I use this combination of technologies, and the first time I deploy a website using cloud provider. So yeah, I learned a lot.
Takeaways and Final Thoughts
If you're just a beginner or even an experienced developer, I always encourage you to build you own portfolio and deploy it to the web. It's a great way to showcase your work, share your thoughts, and learn new technologies in the process. Plus, it's a fun project that you can customize and make it as your own space on the internet.
The source code of my portfolio is open-sourced and available on GitHub, feel free to check it out and use it as a reference for your own portfolio. If you have any questions or suggestions, don't hesitate to reach out to me. I'm always happy to help and share my knowledge with the community.